Category: Classroom Tranformation
Showing posts with label Classroom Tranformation. Show all posts

Let's GLOW! A Classroom Transformation your Students will LOVE! (Part 3: The Academics)

Wednesday, April 24, 2019 No comments


Alright - Are yall ready for ALL THE DETAILS on the academic side of our GLOW DAY Transformation? If you are looking for the decor details, click here. If you are looking for the academic stuff, you are in the right place! Woohoo! You can also read my FIRST EVER Glow Day blog post HERE. It has more details about the stations. = ) 


Alright - Let's jump right in! Just like Part 2, I'm going to answer ALL of the questions you guys asked me over on Instagram. If I miss anything, shoot me a message and I'll get it added! 


Question 1: What are the stations?
For our glow day we have six stations each year. From year to year they change based on what I feel like doing or what I think my kiddos will like best. The stations I had this year are: bowling, ring toss, geo build, ping pong toss, glow targets, and Jenga. I've also done corn hole in the past! For more details about the stations, you can head over to my original blog post HERE.


Question 2: What do I need for the stations?
Alright, for this I'm just going to cover the stations I used this year. = ) Links for each of these items can be found at the bottom of this blog post. 
*Bowling - water bottles, "bowling ball"
*Jenga - Jenga set (with blacklight reactive tape)
*Geobuild - glow sticks, i-Pad
*Ping Pong Toss - cups, Ping Pong balls
*Ring Toss - Gallon Jugs (3 of them), hoops made from glow sticks
*Glow Targets - painted targets, pennies


Question 3: What academic activities do the students do at each station?
We do GLOW DAY before our standardized math test, so we always spend the entire day focusing on math skills. At each station, students focus on different math standards that have been covered, but need to be reviewed. You can grab the task cards I use in my TpT store. I have them made for 3rd, 4th, and 5th grades. The task cards in my store only work for FOUR stations: Jenga, Geobuild, Bowling, and Ring Toss. I chose to add a couple additional stations so that I could make my groups smaller. I just shift some of the task cards from the other stations to the two additional stations. = )

3rd Grade Pack
4th Grade Pack
5th Grade Pack
*Unfortunately at this time, I don't have time to add two additional stations to these packs (there are only four included), but I encourage you to just split up some of the task cards from other stations and put them there. Thats what I did! There are plenty of task cards. = )
Question 4: How long do students spend at each station and
how many students are in each group?
Students are at each station from 30-50 minutes. This time FLIES! I try to have groups of 4-5 if at all possible! The smaller, the better in my opinion. 

Question 5: How do you check student work?
This is a BIG JOB, but I check every single group's answer before they are able to play the game. I keep the answer keys in my hands at all times and I hop from group to group checking student answers. I often ask for different students to explain their answers and always look for everyone to have the correct work. This is a busy job, but I feel like it keeps my students accountable.

Question 6: Where can I get the entry tickets you used?

They are a freebie in my TpT store! I printed and laminated mine and I have used them three years in a row. I collect them the morning of Glow Day and store them away for the next year.
Question 7: Do you keep score in the games?
Students do keep scores, but there isn't a prize or anything. They keep scores for bragging rights. It also helps motivate students to work fast so that they can beat other teams' scores. Scores are kept on a dry erase board or piece of paper. The easier, the better.
Question 8: How often do you do this transformation?
I do this transformation once a year, typically the day before our math state test. Its a fun review that really helps drive home some skills that need to be refreshed before the big test. 

Question 9: What center supplies did you buy on Amazon?

Let's GLOW! A Classroom Transformation your Students will LOVE! (Part 2:Decor Edition)

Tuesday, April 23, 2019 No comments


Guys - its been THREE years since my first ever transformation, which was GLOW DAY 2017 (you can read about the original transformation HERE.). It was the start of a WHOLE lot of transformation magic in my room and I am so thankful that I took the leap three years ago. GLOW DAY is STILL one of my absolute favorite days of the year. There is just something magical about the blue lights and the neon colors. I think it's safe to say its normally my students' favorite day too! I get SOOO many questions about all things glow day so I am going to write two blog posts for you guys. This blog post is going to be ALL about GLOW DAY DECOR. What do you need? How do you set up your room? Etc. Then, I'll work on a post to go over the stations that I do and how I've changed them up since my first year.  If you want to know the logistics of the day, you can read about that HERE.


Alright - GLOW DAY DECOR. Are yall ready? I took to Instagram to ask you guys what questions you had about the decor in my GLOW DAY transformation and you guys asked some awesome questions. I am going to use those questions on this post. If you have a question that wasn't covered, let me know and I'll add it. = )

Question #1 - What do I need to buy and where do I buy it?


I buy 99% of my supplies from Amazon because PRIME. But, you could probably buy a lot of it at Party City, Walmart, and Target. I'll break down the decor purchases in today's post, and I'll cover purchases I used in centers in the next post.
*Item #1 - Blacklights - I am linking the ones I have and they are AMAZING! I have five in my room, but I tested them out and you could definitely get by with only three. I wouldn't spend your money on five. 
*Item #2 - Disco Balls - I use two disco balls on glow day and they add some light and color. I keep these up ALL year long. They are great for celebrations and other transformations.
*Item #3 - Balloons - Blacklight balloons are the coolest! I use fishing wire to hang them from the ceiling and I love the color the add to the room. (I order a 50 pack and use for two years.)
*Item #4 - Blacklight Reactive Paint - I use this paint to paint signs and I even used it on my t-shirt! I roll the signs up and reuse year after year. (I have only bought paint once and have used multiple years and multiple coworkers have used the paint too.)
*Item #5 - Blacklight Reactive Tape - This tape is great for ALL sorts of things. I use it on station items, on the floor, etc. I would definitely grab a pack. (The tape can't be reused so I normally buy a new pack every year or two.)

Question #2 - How do I make my classroom completely dark?


Cover up ALL of your windows! Figuring out how to COMPLETELY darken my windows has been a work in progress, but I have learned that it works best to place black poster board up directly against the class so that the window is completely covered. Then, I go over the top part of the window with black butcher paper. Two layers (using the thick, black poster board), has been doing the trick for me!

Question #3 - Where should I place the black lights in my room?
I place a blacklight on each wall in my classroom. The main goal is to scatter them around. I also like to put them at different heights. I find that if I place one up hight on a bookshelf, it helps ensure that the balloons are glowing extra brightly. It is important to stick them lower as well so that the tape on the games is lit up brightly as well. With my five black lights, I have three up high on bookshelves and two lower on tables.

Question #4 - My room is darker than yours with the black lights, how do I brighten it up?
The black lights I have are SUPER bright, but if your stuck with some of the more old-school versions, try scattering some white sheets around your room on unused tables. The white reflects the black lights and it will really brighten up the space.

Question #5 - Was there anything that was a FAIL and didn't work under the black lights?
My first year I tried glow in the dark easter eggs and they were a MAJOR fail. Ha! Also, I have found that most of the blue items don't glow very well. I avoid using the blue balloons, blue tape, and blue paint.

Winter Games: A Classroom Transformation

Saturday, February 24, 2018 6 comments

Amazon Affiliate links are provided in this blog post for your convenience.

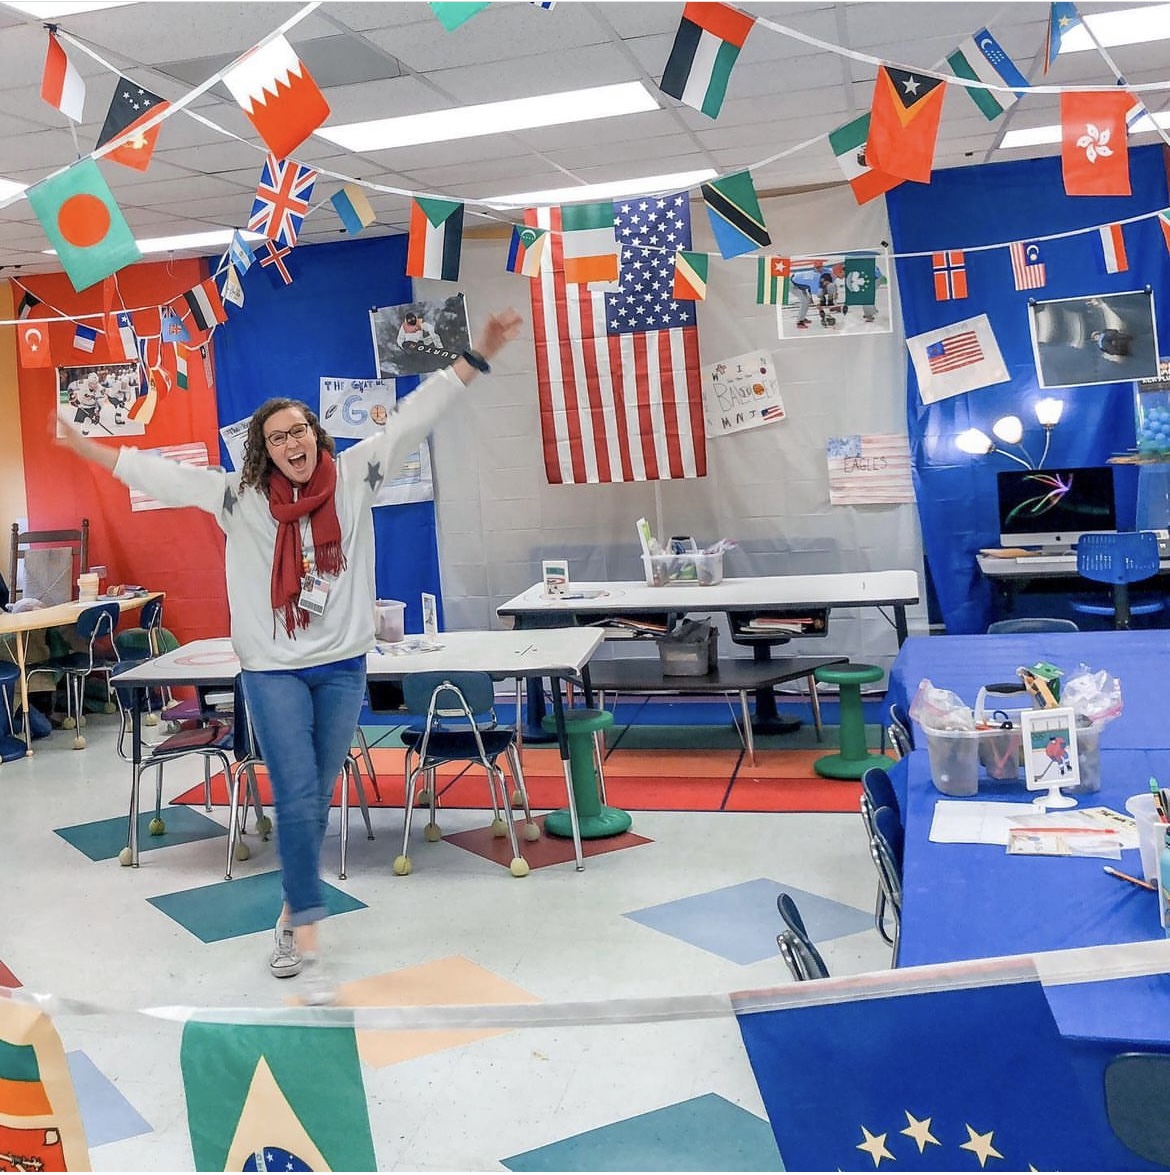
Guys. I am SO excited to write this blog post for you guys. For the past two days at school, my fifth graders have taken part in the 2018 Winter Games. We did these games to go along with this year's Olympic Games, but it could totally be done anytime during the winter months by just calling them the Winter Games. Myself and my coworkers are already talking about doing this transformation again next year with the title of the "Winter Sports World Championship". It doesn't have to be Olympic themed to still be SO MUCH FUN. During this blog post, I'll break down what we did and how we decorated. If you have any questions, don't hesitate to leave a comment and I'll get back to you.

The Decorations: 
The decorations for this transformation were cheap and easy (YESSSS!). I spent less than $50 on all of my supplies. I bought 11 tablecloths, and five packages of streamers from the dollar store for a dollar a piece (Totaling less than $18). Since we did Olympic themed, I bought everything in Olympic ring colors, but if you are just doing Winter Games themed, you could buy any time of fun colors! I also bought a world flag banner from Amazon that was AWESOME quality and super fun! I am already trying to think of another way I can use this awesome banner! I also have some fun disco lights that I leave up all year and turn on for special events like these. They are also from Amazon and I LOVE them!

Setting the STAGE:
One of my FAVORITE things to do before a transformation is to set the stage. I always send home an entry ticket to get the students interested and excited for the next day. For this transformation I added a letter of acceptance into the games and I really love how they turned out! = ) This note was sent home the day before the event and students were told to bring the ticket back the next day.

The Math Events:
The Luge, Curling, Speed Skiing, and Hockey

Items needed:
-Skates and Cones (I got both from our PE teacher.)
-Task cards/Recording page
-Stopwatch (We used our i-Pads)
How to play:
I set up two cones on one side of my classroom and two more at the other side. Task cards were scattered on the floor on the opposite side of my room behind the cones. One student would get on the skate/luge, and roll across the room to the task cards. Student had to keep his/her bottom on the luge and feet off the ground. Once the student made it to the task cards, they grabbed one, and brought it back across the room to the group. Another student timed how long it took the student to do this. Once task card was back to the group, the entire group worked together to solve it. After the card was solved, I'd come over and check it, and then the process would continue. Students continued the process and recorded their time each round. Students added up their best 6 times for their total "Luge" score.

Items needed:
-Cones (I got these from our PE teacher.) 
-Task cards/Recording page
-Stopwatch (We used our i-Pads)
-Two pieces of cardstock
How to play:
This game was set up in the hallway outside of my classroom.  I set up two cones about 15 feet away from each other. I hung an envelope with task cards next to the cone furthest away from my classroom. One student would jump onto two pieces of cardstock and "ski" down to the task card envelope. They'd grab a task card and then head around the cone, back to the starting line. If the student lost a ski, they had to go back to where the ski was before continuing. Another student timed how long it took the student to go down to the task card envelop and back. Once task card was back to the group, the entire group worked together to solve it. After the card was solved, I'd come over and check it, and then the process would continue. Students continued the process and recorded their time each round. Students added up their best 6 times for their total "Speed Skiing" score.


 Items needed:
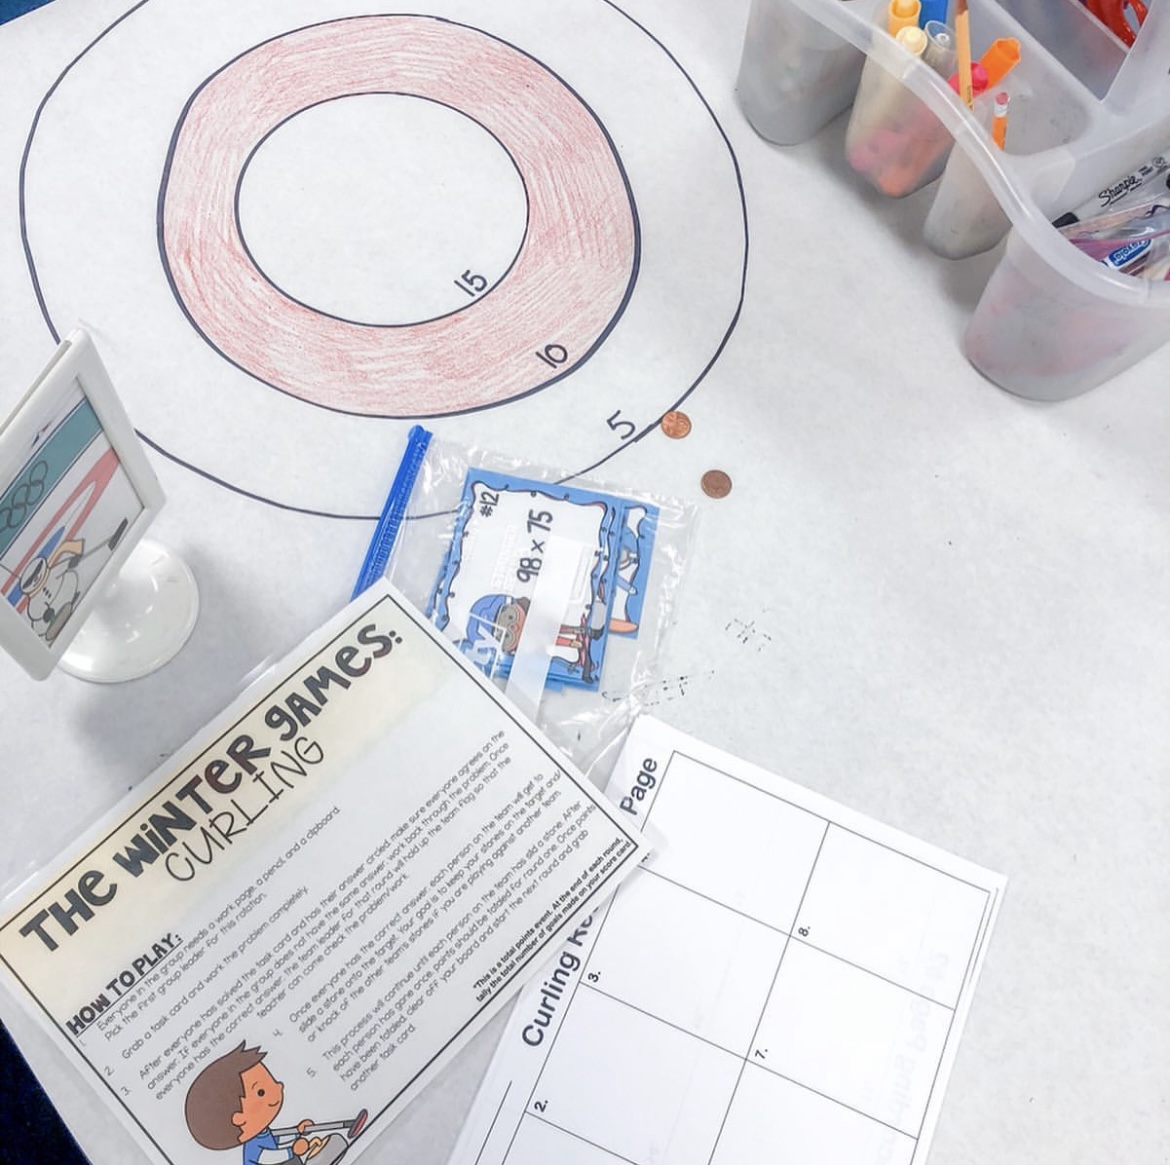
-Wax Paper (with a target drawn on it)
-Pennies/Dimes
-Task cards/Recording page

How to play:
For this activity, students began by first working a task card. After the card was solved, I'd come over and check it. Once everyone had the correct work and answer, each student in the group would get one chance to "curl". Students would each grab a penny and slide it across the table and try to hit the target. After each student went, they totaled up how many points they earned for that round and recorded them on their recording page. You could also play this with two teams. The two teams would be trying to score points and knock each other's pennies/dimes off the game board.

 Items needed:
-Hockey Goal/Stick/Cones/Ball (I got everything from our PE teacher)
-Task cards/Recording Page
How to play:
For this activity, students began by first working a task card. After the card was solved, I'd come over and check it. Once everyone had the correct work and answer, each student in the group would get one chance to score a goal. Students would tally the points they made for that round, and then get back to work on the next task card. Students had to shoot from about 10 feet back from the goal.

Other Events/Activities:
* We started our transformation by breaking our kiddos into teams and they each made a team flag that they used for the entire two days. After teams were created and flags were made, we had our opening ceremonies and paraded around the school. Our assistant principal live streamed the parade on our school's Facebook page and interviewed our kiddos like they were actual Olympians. It was SO much fun.
*Virtual Breakout - The plan was to start out our Winter Games with this Olympic activity, but the internet was down, so we ended up doing this on the second day of our transformation.
*Reading/Stem Passages from Top Floor Teachers - This resources is incredible. This resources is packed full of passages about Winter Games events and each passage has a fun STEM project.

Points:

Throughout the course of the two days, students earned points for their teams. We tallied our points on a large scoreboard in our classroom. Students LOVED seeing real-time totals. Our class totals were then compared to the totals in other 5th grade classrooms at our school to determine who won the gold!
 
You can grab the task cards/entry tickets/directions I used over on my TPT store HERE.

This was by far one of my FAVORITE transformations I've done so far! You should totally give it a try in your own classroom! If you have any questions, please don't hesitate to reach out via commenting on this blog, or by sending me an email! Thanks! = )


LEARN & PLAY: Inflatable Yard Games in the Classroom!

Friday, September 8, 2017 2 comments
At the end of last school year, I completed my first ever "RCA Inspired" classroom transformation for our state testing math review. Check out our Glow Day Transformation HERE. After "Glow Day" went so well last Spring, I knew I wanted to do more classroom transformations in the future. My students were engaged and excited all day long... why wouldn't I want to do transformations more often?!

This summer when I was shopping the Target Dollar Spot and found inflatable yard games, I knew I had found my first classroom transformation for the next school year. I bought a set of inflatable dice, an inflatable ring toss, and even an inflatable bowling set. Although these inflatables are no longer available at Target, you can grab them for a super affordable price on Amazon and I've linked my favorite options below. This summer I created games and task cards to go with each station so I'd be ready to go with a fourth grade math review during the first week of school! I know I'm not the only one who grabbed up ALL things inflatable from the Target Dollar Spot, so thought I'd break down each station for you below so that you can do this easy transformation in your own classroom!  You can grab my pack on TPT here

Inflatable Transformation: The Basics
Our classroom transformation lasted half a day, and the only thing I did to prep was to move our tables out of the way. Students stayed at each station for 30-40 minutes and could have stayed even longer! The MOST IMPORTANT part of a classroom transformation is the instructions beforehand and the setting of high expectations. If directions are clear and expectations are high, your transformation will be a HUGE SUCCESS!

Station 1: Inflatable Bowling


What you need for this station:
-Bowling Recording Sheet (one per group)
-Set of task cards
-Recording sheet (one per student)

How to play:
At this center, students worked with their team to answer a task card. My task cards were a review of 4th grade math standards. This allowed me to see what my students remembered from 4th grade and what we needed to review before beginning 5th grade standards (win-win)! After each group member had completed a math task card, discussed their answer, and everyone agreed on the correct answer, each group member got a chance to bowl once. Students recorded how many pins they knocked over on the bowling recording sheet and once all students had bowled, the group grabbed another task card.

Station 2: Read it. Write it. Round it.

What you need for this station:
-Recording page for each student

How to play:
This was a simple station, but the kids loved it! I had my students in groups of four, so each student was in charge of a dice. Students took turns rolling their dice and each number was recorded on the student recording sheet. Once four dice had been rolled, students wrote the number in word and expanded form and rounded the number. The front recording sheet used four dice, and the back of the recording sheet allowed students to roll six dice for a more challenging task.

Station 3: Inflatable Ring Toss


What you need for this station:
-Ring Toss Recording Sheet (one per group)
-Set of task cards
-Recording sheet (one per student)

How to play:
This center was similar to bowling...  students worked with their team to answer a task card. After each group member had completed a math task card independently, discussed their answer with their group, and everyone agreed on the correct answer, each group member got a chance to play the ring toss game once. Students recorded how many many points they had scored (each ring toss was labeled) over on the ring toss recording sheet and once all students had played ring toss once, the group grabbed another task card and the process continued.

Station 4: Five-in-a-Row Dice Game
What you need for this station:
-Four in a row game board
-Game markers (I used extra math manipulative I had lying around.)

How to play:
The object of this game is to get five in a row. You can multiply, add, or subtract in order to get your lucky number. The goal of this game is to get your kiddos problem-solving! First, you will need two teams. I had groups of four, so my students created two teams of two. Team one rolls both of their dice and decides whether or add, subtract, or multiply the two numbers they rolled. Whatever they decide on, they mark out that number on the game board. Team two does the same thing as team one. They roll, add/subtract/multiply, pick their number and place a marker on the game board. Teams continue rotating back and forth until one team gets five in a row. As more markers are on the game board, teams will have to problem-solve to determine the best number to cover up. I thought this would be my students' least favorite station, but the friendly competition made it a crowd favorite!

Alright, friends! There you have it! 
Four fun centers that will keep your kiddos engaged and excited for an entire afternoon! If you are looking for a simple transformation that your kiddos will love, this is a great one for you! You can grab EVERYTHING you'll need for your transformation by clicking the Amazon links below. You can also grab my inflatable yard game TPT resource that includes station directions, 5th grade level task cards, and a fully editable powerpoint for those of you not in 5th grade so you can easily make your own questions! If you have any questions, please let me know!

Have you done a classroom transformation yet this year?
If so, let me know what kind! I'd love to hear it! = )
Happy Transforming!


Let's Glow! A classroom transformation that your students will LOVE!

Thursday, April 27, 2017 19 comments
(Amazon Affilate links are provided in this post for your convenience.)

Let's GLOW! After visiting RCA last October, myself and my teacher bestie committed to planning and completing an RCA inspired classroom transformation before the end of the year. Our first transformation took place last Wednesday, and OH MY GOSH, I am obsessed and 100% committed to doing several next school year! Keep reading and I PROMISE to tell you all about it! = )

Over the course of the last month we have been prepping for state testing like CRAZY. We have been  reviewing and re-covering and practicing, practicing, practicing. Both myself and my teacher bestie both tested on Thursday, so we thought Wednesday would be a fun day for some last minute testing review through a classroom transformation so... GLOW DAY 2017 was born!

I'd like to start by saying that all of our ideas were adapted from the AMAZING Hope King over at Elementary Shenanigans. We decided to use her "glow games" theme because when doing something new, why recreate the wheel when someone else has already
done something amazing?

We started by gathering the supplies that we needed. The hardest thing to find was most definitely black lights. We didn't want to spend money on black lights, so I reached out to anyone and everyone in search of some we could borrow. A local fire station who has a haunted house in October had some we were able to borrow! Whew! I suggest trying to find some before buying your own! If you can't find any, you can grab these off of Amazon.  Since we were able to get our backlights for free, we spend a total of about $40-50 a piece on our classroom transformation. SO cheap... music to my ears. Hah!

Okay, now for the details! Eek!
In order to get the kids intrigued and excited, I sent them each home with a ticket the night before our glow day. Other than what the ticket told them, the knew nothing. They were asking all sorts of questions but I kept it all a mystery!


You can grab these tickets as an editable freebie HERE on my TPT store. They are also included in the Glow Day Pack on my TPT store as well.

The next day when they entered our classroom, they had to provide their ticket. When they walked through the classroom door,
this is what they found...

The picture honestly doesn't do it justice. I LOVED hearing my kiddos reactions as they entered our transformed classroom. On the way in the door they grabbed some super cool glow stick glasses I purchased on Amazon and our day of amazingness began.

Alright, now for the stations...
We had 5 different stations and students stayed at
each station for 30-40 minutes.
It took our students the entire day to work through all 5 stations. 

Station 1: Ring Toss

(Supplies needed: the jugs, glow sticks, task cards)
At this station there were three different colored task cards. Each color card was a different skill. Students picked a card and answered the question independently. Once everyone answered independently and then agreed on an answer, each student got to throw a ring at the appropriately colored jug. Once everyone tossed, they moved on to the next task card.

Station 2: Geometry that GLOWS!

(Supplies needed: iPad with PicCollage, glowsticks, task cards)
This station was super simple, but the kiddos loved it. Students worked to create different shapes/angles/etc. using glow sticks and they took pictures of them and posted them into PicCollage on a graphic organizer. There were a few task cards sprinkled in on the graphic organizer so that students would have plenty to do.

Station 3: Let's Bowl!


(Supplies needed: water bottles, glow sticks, hamster ball, dice)
The station was one of the more elaborate ones. Students practiced creating numbers/fractions/decimals, ordering them, writing them in multiple forms, and rounding them. Students rolled the dice to create the numbers. Once they completed one "round" in their student booklet (more on that later) each student got one bowl. They recorded the number of pens that knocked down on a bowling sheet.

Station 4: Jenga

We wrapped each Jenga block with backlight reactive tape. We had five colors of tape and each color went with the same color task card. A student pulled a task card, everyone answered the question/discussed, and then the student who pulled the card got to pull a Jenga block. 

Like I said earlier, all students rotated through all 4 stations. Student each had a recording book where they organized and recorded their work all day long. I had a light up wand that I passed to different groups as I caught them working well together and staying on task. This motivated the students to work as a team because they wanted to hold the magical wand!

It was an AMAZING day. I have never seen my students so engaged and motivated as they were on this day. I am not gonna lie, I was a bit scared about doing a classroom transformation. Would my kids be CRAZY? Would they stay on task? I was CRAZY to even question them. I cannot wait to do more of these transformations next year!


So, now that I’ve told you all about our AMAZING day, have I convinced you to give it a try? If you are a 5th grade teacher, you can grab 90+ pages worth of resources and task cards that go with all four of these stations over on my TPTpage. Everything you need to complete the educational side of these centers is in this pack!

Grab the Pack HERE.

Have you done a transformation?
What was your theme? I'd love to hear all about it!

Grab all of the supplies you need off of Amazon Prime below!
(I split the glasses and glowsticks with a teammate in order to cut down on the cost.)


(Amazon Affilate links are provided in this post for your convenience.)